这是 GDC 上关于 VDR 颜色管线的先进技术与优化 演讲系列中想法的初步拓展。本文详细介绍了适用于 sRGB 等传统传递函数的对称颗粒的生成。
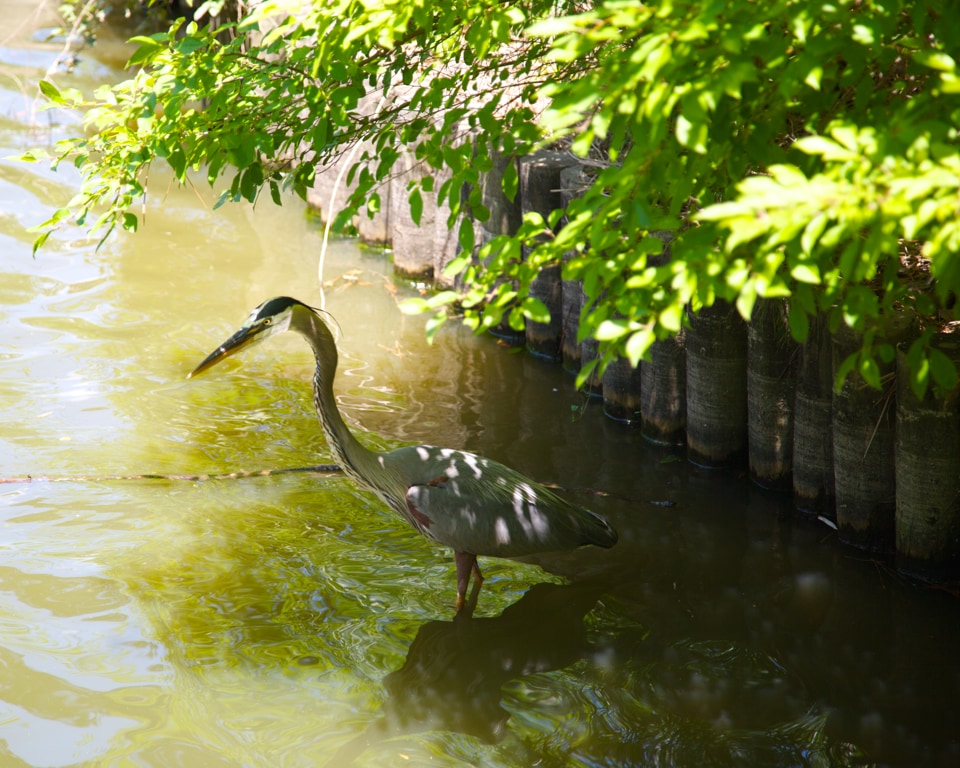
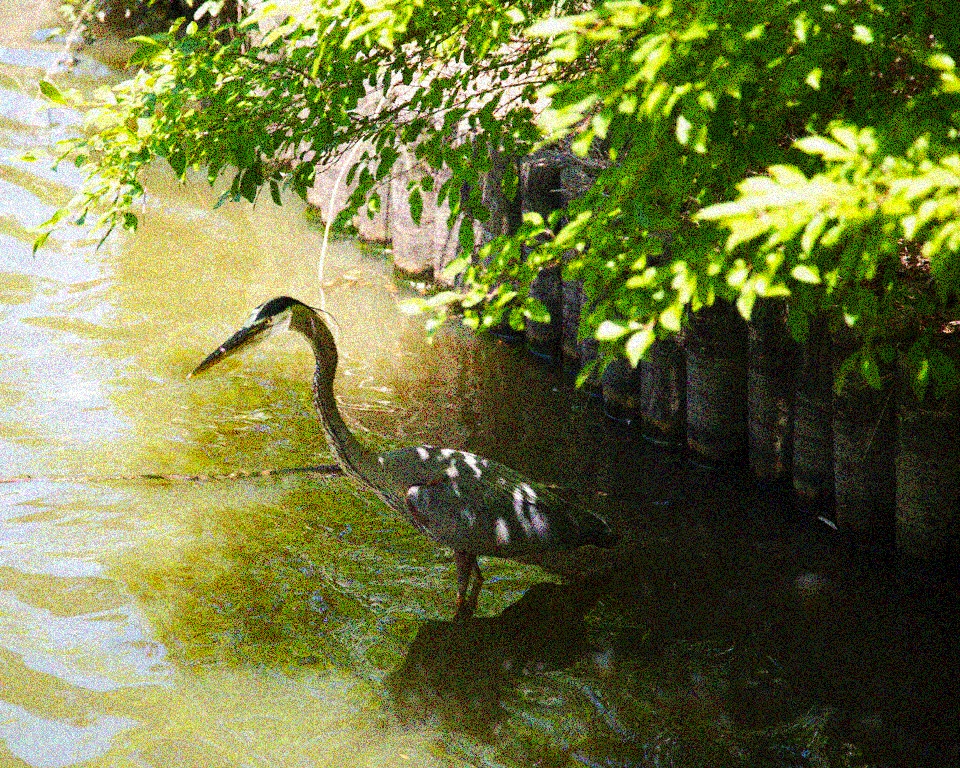
下面是演讲中抖动部分使用的原始照片。选择这张照片是因为它兼具平滑和细节丰富的区域,并且包含难以量化的去饱和颜色。
现在展示了 sRGB 中 8 级量化,未添加任何颗粒。量化采用的是最近线性距离(对于少步长,这比最近非线性差异具有视觉优势)。

接下来,在量化并转换为 sRGB 之前,在线性空间中添加了以下重复的通用伪随机噪声纹理(作为简陋的颗粒替代品)。
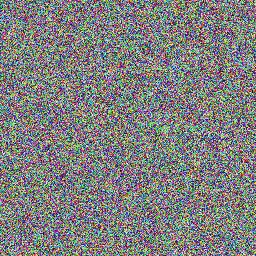
这种噪声非常类似于 Gregory Igehy 的《着色器伪随机生成器笔记》 中描述的“fract, sin/cos, dot”无纹理方法的结果。转换后的图像效果如下。
虽然比不加颗粒的量化有所改进,但应用这种颗粒会导致各种伪影,因为眼睛会被颗粒的结构所干扰。再次查看噪声纹理,这一次只看一个通道,可以看到噪声中混合了大量的低频内容。
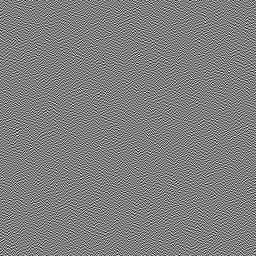
为了改进这一点,可以将噪声塑造成视觉上令人愉悦的颗粒,例如通过对 x 和 y 轴都应用高通滤波器。在这种情况下,每个轴使用不同的截止频率,以营造纸张纹理的感觉。
另一种方法是使用一些其他照片源,并将其转换为平铺纹理。这两种情况都可能由于颗粒纹理中值的分布不均而导致问题。可以使用以下方法将颗粒纹理重塑为完全平衡的值分布。
- 对于给定通道的所有纹理单元(texel),构建一个 64 位值:{32 位通道强度,16 位纹理单元 x 坐标,16 位纹理单元 y 坐标}。
- 随机打乱 64 位值的顺序(以处理重复项)。
- 使用基数排序对所有 64 位值进行排序。
- 将排序后的位置除以纹理单元的总数,得到新的纹理单元通道强度。
- 使用打包的 {16 位纹理单元坐标} 将新的纹理单元强度重新散布到原始图像中。
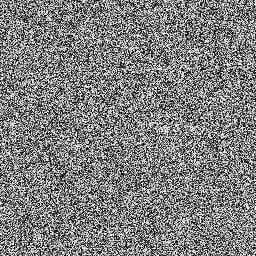
将上述过程应用于先前的颗粒纹理,得到单通道的以下结果。
以及完整彩色颗粒纹理的结果。
将此新颗粒应用于原始图像,可得到以下高质量结果(这仅是一个每通道 3 位 sRGB 图像)。

关于颗粒应用的细节
从本文中图像所使用的技术开始,
// Quantization steps, for 8-bit for example this would be 256.float quantizationSteps;
// Linear color input.float3 color = ...;
// This is used to limit the addition of grain around black to avoid increasing the black level.// This should be a pre-computed constant.// At zero, grain amplitude is limited such that the largest negative grain value would still quantize to zero.// Showing the example for sRGB, the ConvertSrgbToLinear() does sRGB to linear conversion.float grainBlackLimit = 0.5 * ConvertSrgbToLinear(1.0 / (quantizationSteps - 1.0));
// This should also be a pre-computed constant.// With the exception of around the blacks, a constant linear amount of grain is added to the image.// Technically with low amounts of quantization steps, it would also be good to limit around white as well.// Given the primary usage case is high number of quantization steps,// limiting around whites is not perceptually important.// The largest linear distance between steps is always the highest output value.// This sets the constant linear amount of grain to fully dither the highest output value.// This does result in a higher-than-required amount of grain in the darks.// Using 0.75 leaves overlap to ensure the grain does not disappear at the linear mid-point between steps.float grainAmount = 0.75 * (ConvertSrgbToLinear(1.0 / (quantizationSteps - 1.0)) - 1.0);
// Point-sampled grain texture scaled to {-1.0 to 1.0}.// Note the grain is sampled without a sRGB-to-linear conversion.// Grain is a standard RGBA UNORM format (not sRGB labeled).float3 grain = ...;
// Apply grain to linear color.color = grain * min(color + grainBlackLimit, grainAmount) + color;
当颗粒在时间上应用时,通过向 SV_Position 输入每帧偏移量,可以用来在时间上偏移颗粒纹理。使用具有 1024 帧周期的 {2,3} Halton 序列效果相当不错。这种添加颗粒的方法速度很快,额外实现只需要 {1 个纹理单元、13 个 VALU 指令}。
// Example minimal shader (ideally grain would get folded into some other pass).// Showing with the associated VALU opcodes used interleaved in comments.cbuffer CB0 : register(b0) { int2 halton; float2 grainConst; };Texture2D texColor;Texture2D texGrain;float3 main(float4 vpos : SV_Position) : SV_Target { // 2x V_CVT_I32_F32 int3 pos = int3(vpos.xy, 0); float3 color = texColor.Load(pos).rgb; // 2x V_ADD_I32, 2x V_BFE_U32 pos.xy = (pos.xy + halton) & 255; float3 grain = texGrain.Load(pos).rgb; // 3x V_ADD_F32, 3x V_MIN_F32, 3x V_MAC_F32 return grain * min(color + grainConst.x, grainConst.y) + color;}